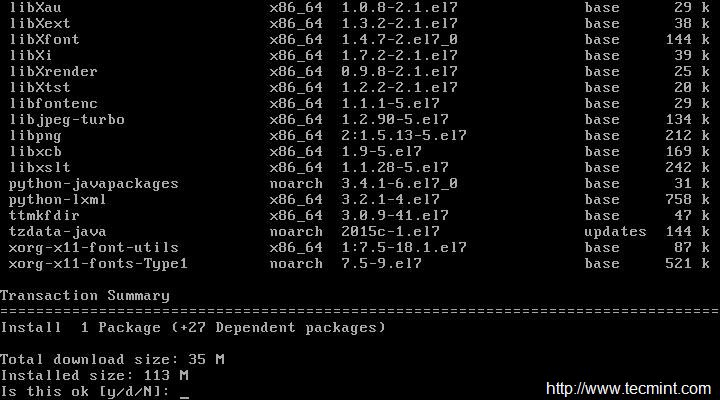
12. Install Apache Tomcat
Tomcat is a servlet container designed by Apache to run Java HTTP web server. Install tomcat as below but it is necessary to point out that you must have installed Java prior of installing tomcat.
# yum install tomcat
Install Apache Tomcat
After tomcat has been installed, star the tomcat service.
# systemctl start tomcat
Check Version of tomcat.
# /usr/sbin/tomcat version
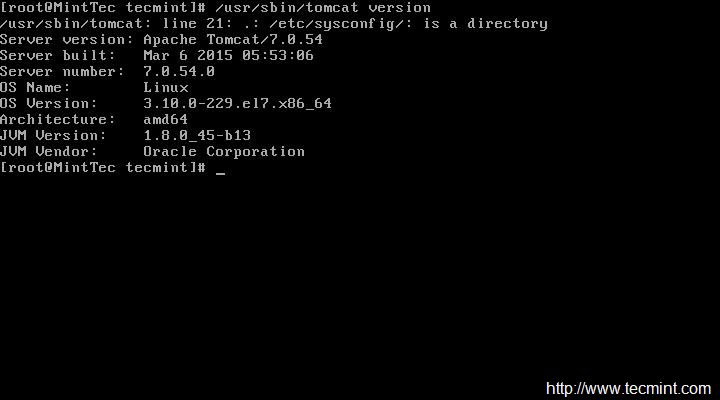
Check Tomcat Version
Add service tomcat and default port (8080) through firewall and reload settings.
# firewall-cmd --zone=public --add-port=8080/tcp --permannet
# firewall-cmd –reload
Now it’s time to secure tomcat server, create a user and a password to access and manage. We need to edit file ‘/etc/tomcat/tomcat-users.xml‘. See the section which looks like:
<tomcat-users>
....
</tomcat-users>


<role rolename="manager-gui"/>
 <role rolename="manager-script"/>
 <role rolename="manager-jmx"/>
 <role rolename="manager-status"/>
 <role rolename="admin-gui"/>
 <role rolename="admin-script"/>
 <user username="tecmint" password="tecmint" roles="manager-gui,manager-script,manager-jmx,manager-status,admin-gui,admin-script"/>
</tomcat-users>

Secure Tomcat
Here we added user “tecmint” to administer/manage tomcat using password “tecmint”. Stop and start the service tomcat so that the changes are taken into effect and enable tomcat service to start at system boot.
# systemctl stop tomcat
# systemctl start tomcat
# systemctl enable tomcat.service
Read Also: Installing and Configuring Apache Tomcat 8.0.9 in RHEL/CentOS 7.0/6.x
13. Install Nmap to Monitor Open Ports
Nmap for Network Mapper creates a map of the network by discovering host on which it is running as well as by analyzing network. nmap is not included in the default installation and you have to install it from repository.
# yum install nmap

Install Nmap Monitoring Tool
List all open ports and corresponding services using them on host.
# nmap 127.0.01

Monitor Open Ports
You may also use firewall-cmd to list all the ports, however I find nmap more useful.
# firewall-cmd --list-ports

Check Open Ports in Firewall
Read Also: 29 Useful Nmap Command to Monitor Open Ports
firewalld is a firewall service which manages the server dynamically. Firewalld removed iptables in CentOS 7. Firewalld is installed by default on RedHat Enterprise Linux and its derivatives by default. With iptables every change in order to be taken into effect needs to flush all the old rules and create new rules.
However with firewalld, no flushing and recreating of new rules required and only changes are applied on the fly.
Check if Firewalld is running or not.
# systemctl status firewalld
OR
# firewall-cmd –state

Check Firewalld Status
Get a list of all the zones.
# firewall-cmd --get-zones

Check Firewalld Zones
To get details on a zone before switching.
# firewall-cmd --zone=work --list-all

Check Zone Details
To get default zone.
# firewall-cmd --get-default-zone

Firewalld Default Zone
To switch to a different zone say ‘work‘.
# firewall-cmd --set-default-zone=work

Swich Firewalld Zones
To list all the services in the zone.
# firewall-cmd --list-services

List Firewalld Zone Services
To add a service say http, temporarily and reload firewalld.
# firewall-cmd  --add-service=http
# firewall-cmd –reload

Add http Service Temporarily
To add a service say http, permanently and reload firewalld.
# firewall-cmd --add-service=http --permanent
# firewall-cmd --reload

Add http Service Permanent
To remove a service say http, temporarily.
# firewall-cmd  --remove-service=http
# firewall-cmd --reload

Remove Firewalld Service Temporarily
To remove a service say http, permanently.
# firewall-cmd --zone=work --remove-service=http --permanent
# firewall-cmd --reload

Remove Service Permanently
To allow a port (say 331), temporarily.
# firewall-cmd --add-port=331/tcp
# firewall-cmd --reload

Open Port Temporarily
To allow a port (say 331), permanently.
# firewall-cmd --add-port=331/tcp --permanent
# firewall-cmd --reload

Open Port Permanently
To block/remove a port (say 331), temporarily.
# firewall-cmd --remove-port=331/tcp
# firewall-cmd --reload

Remove Port Temporarily
To block/remove a port (say 331), permanently.
# firewall-cmd --remove-port=331/tcp --permanent
# firewall-cmd --reload

Remove Port Permanently
To disable firewalld.
# systemctl stop firewalld
# systemctl disable firewalld
# firewall-cmd --state

Disable Firewalld Service
To enable firewalld.
# systemctl enable firewalld
# systemctl start firewalld
# firewall-cmd --state

Enable Firewalld
- How to Configure ‘FirewallD’ in RHEL/CentOS 7
- Useful ‘FirewallD’ Rules to Configure and Manage Firewall
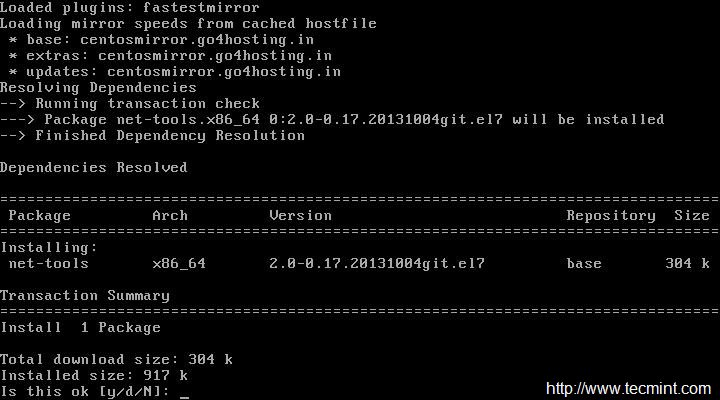
15. Installing Wget
wget is a Linux command line based utility that retrieves (downloads) content from web servers. It is an important tool you must have to retrieve web contents or download any files using wget command.
# yum install wget

Install Wget Tool
For more usage and practical examples on how to use wget command to download files on the terminal, read 10 Wget Command Examples.
16. Installing Telnet
Telnet is a network protocol that enables a user to login into another computer on the same network over TCP/IP. Once connection etablished to the remote computer it becomes a virtual terminal and allow you to communicate with the remote host within your computer as per whatever privileges provided to you.
Telnet also very useful for checking listening ports on remote computer or host.
# yum install telnet
# telnet google.com 80

Telnet Port Checking
17. Installing Webmin
Webmin is a Web based configuration tool for Linux. It acts as a central system to configure various system configuration like users, disk quota, services and configurations of HTTP server, Apache, MySQL, etc.
# wget http://prdownloads.sourceforge.net/webadmin/webmin-1.740-1.noarch.rpm
# rpm -ivh webmin-*.rpm

Install Webmin
After webmin installation, you will get a message on terminal to login to your host (http://ip-address:10000) using your root password on port number 10000. If running a headless server you can forward the port and access it on a machine/server that is headed.
18. Enable Third Party Repositories
It is not a good idea to add untrusted repositories specially in production and it may be fatal. However just for example here we will be adding a few community approved trusted repositories to install third party tools and packages.
Add Extra Package for Enterprise Linux (EPEL) Repository.
# yum install epel-release
Add Community Enterprise Linux Repository.
# rpm -Uvh http://www.elrepo.org/elrepo-release-7.0-2.el7.elrepo.noarch.rpm

Install Epel Repo
Attention! Extra care is needs to be taken while adding Third Party Repository.
19. Install 7-zip Utility
In the CentOS Minimal Install you don’t get utility like unzip or unrar. We have the option to install each utility as required or an utility that servers for all. 7-zip is such an utility which compress and extract files of all known types.
# yum install p7zip

Install 7zip Tool
Notice: The package is downloaded and installed from Fedora EPEL 7 Repository.
20. Install NTFS-3G Driver
A small yet very useful NTFS driver called NTFS-3G is available for most of the UNIX-like distribution. It is useful to mount and access Windows NTFS file system. Though other alternatives like Tuxera NTFS is available, NTFS-3G is most widely used.
# yum install ntfs-3g

Install NTFS-3G to Mount Windows Partition
After installing ntfs-3g has been installed, you can mount Windows NTFS partitions (where /dev/sda5 is my windows drive) using following command.
# mount -ro ntfs-3g /dev/sda5 /mnt
# cd /mnt
# ls -l
21. Install Vsftpd FTP Server
VSFTPD which stands for Very Secure File Transfer Protocol Daemon is a FTP server for UNIX-like System. It is one of the most efficient and secure FTP Server available today.
# yum install vsftpd

Install Vsftpd FTP
Edit the configuration file located at ‘/etc/vsftpd/vsftpd.conf‘ to secure vsftpd.
# vi /etc/vsftpd/vsftpd.conf
Edit a few fields and leave other as it is, unless you know what you are doing.
anonymous_enable=NO
local_enable=YES
write_enable=YES
chroot_local_user=YES
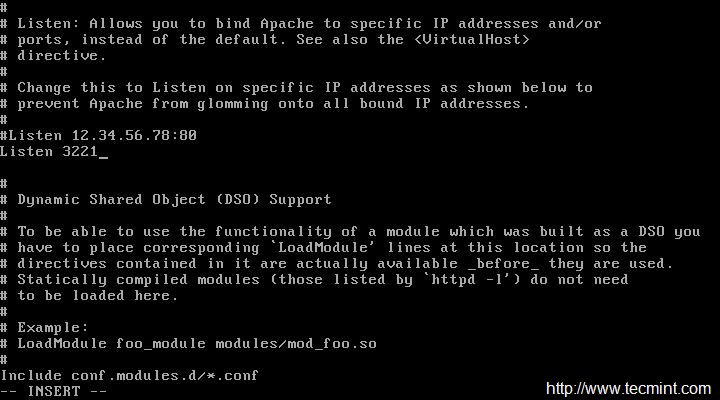
You may also change the port number and open vsftpd port through the firewall.
# firewall-cmd --add-port=21/tcp
# firewall-cmd --reload
Next restart vsftpd and enable to start at boot time.
# systemctl restart vsftpd
# systemctl enable vsftpd
22. Install and Configure sudo
sudo which is commonly called as super do as well as suitable user do is a program for UNIX-like operating system to execute a program with the security privileged of another user. Let’s see how to configure sudo…
# visudo
It will open the file /etc/sudoers for editing..

sudoers File
Give all the permission (equal to root) to a user (say tecmint), that has already been created.
tecmint ALL=(ALL) ALL
Give all the permission (equal to root) to a user (say tecmint), except the permission to reboot andshutdown the server.
Again open the same file and edit it with the below contents.
cmnd_Alias nopermit = /sbin/shutdown, /sbin/reboot
Then add alias with Logical (!) operator.
tecmint ALL=(ALL) ALL,!nopermit
Give permission to a group (say debian) to run a few root privilege command say (add user and delete user) .
cmnd_Alias permit = /usr/sbin/useradd, /usr/sbin/userdel
And then add the permission to group debian.
debian ALL=(ALL) permit
23. Install and Enable SELinux
SELinux which stands for Security-Enhanced Linux is a security module at kernel level.
# yum install selinux-policy

Install SElinux Policy
Check SELinux Mode.
# getenforce

Check SELinux Mode
The output is enforcing mode which means SELinux policy is in effect.
For debugging, set selinux mode to permissive temporarily. No need to reboot.
# setenforce 0
After debugging set selinux to enforcing again without rebooting.
# setenforce 1
24. Install Rootkit Hunter
Rootkit Hunter abbreviated as Rkhunter is an application that scan rootkits and other potentially harmful exploits in Linux systems.
# yum install rkhunter

Install Rootkit Hunter
Run rkhunter as a scheduled job, from a script file or manually to scan harmful exploits in Linux.
# rkhunter --check

Scan for rootkits

RootKit Scan Results
25. Install Linux Malware Detect (LMD)
Linux Malware Detect (LMD) is a open source Linux malware scanner released under the GNU GPLv2 license, that is
specially designed for threats faced in hosting environments. For complete installation, configuration and usage of LMD can be found at:
- Install and Use (LMD) with ClamAV as Antivirus Engine
26. Server Bandwidth Testing with Speedtest-cli
speedtest-cli is a tool written in python to test internet bandwidth including download and upload speed. For complete installation and usage of speedtest-cli tool, read our article at Check Linux Server Bandwidth Speed from Command Line
27. Configure Cron Jobs
This is one of the most widely used software utility. It function as job scheduler i.e., schedule a job now that will execute in future itself. It is useful in logging and maintaining records unattained as well as several other routine work like regular backup. All the schedule is written in /etc/crontab file.
The crontab file contains 6 fields as follows:
Minutes	         Hour		Day of Month		Month of Year		Week Day		Command
(0-59)           (0-23)		  (1-31)                (1/jan-12/dec)       (0-6/sun-sat)          Command/script

Crontab Fields
To run a cron job (say run /home/$USER/script.sh) everyday at 04:30 am.
Minutes 	  Hour   	Day of Month        month of year 	Week Day         command
30                4  		      *		         *		   *            speedtest-cli
Add the following entry to the crontab file ‘/etc/crontab/‘.
30 4 * * * /home/$user/script.sh
After adding the above line to crontab, it will run automatically at 04:30 am everyday and the output depends upon what is there in script file. Moreover script can be replaced by commands. For more examples of cron jobs, read 11 Cron Jobs Examples in Linux
28. Install Owncloud
Owncloud is a HTTP based data synchronization, file sharing and remote file storage application. For more detail on installing own cloud, you may like to see this article : Create Personal/Private Cloud Storage in Linux
29. Enable Virtualization with Virtualbox
Virtualization is a process of creating virtual OS, Hardware and Network, is one of the most sought technology of these days. We will be discussing on how to install and configure virtualization in detail.
Our CentOS Minimal server is a headless server. Lets prepare it to host virtual machines that is accessible over HTTP by installing following packages.
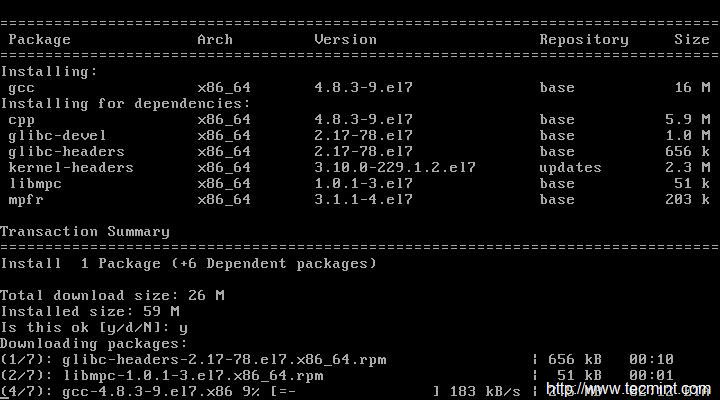
# yum groupinstall 'Development Tools' SDL kernel-devel kernel-headers dkms

Install Development Tools
Change working directory to ‘/etc/yum.repos.d/‘ and download Virtualbox repository.
# wget -q http://download.virtualbox.org/virtualbox/debian/oracle_vbox.asc
Install the key just downloaded.
# rpm --import oracle_vbox.asc
Update and Install Virtualbox.
# yum update && yum install virtualbox-4.3
Next, download and install Virtualbox extension pack.
# wget http://download.virtualbox.org/virtualbox/4.3.12/Oracle_VM_VirtualBox_Extension_Pack-4.3.12-93733.vbox-extpack
# VBoxManage extpack install Oracle_VM_VirtualBox_Extension_Pack-4.3.12-93733.vbox-extpack

Install Virtualbox Extension Pack

Installing Virtualbox Extension Pack
Create a user ‘vbox‘ to manage virtualbox and add it to group vboxusers.
# adduser vbox
# passwd vobx
# usermod -G vboxusers vbox
Install HTTPD server.
# yum install httpd
Install PHP (with soap extension).
# yum install php php-devel php-common php-soap php-gd
Download PHP virtualBox.
# wget http://sourceforge.net/projects/phpvirtualbox/files/phpvirtualbox-4.3-1.zip
Extract the zip and copy the extracted folder to HTTP working directory.
# unzip phpvirtualbox-4.*.zip
# cp phpvirtualbox-4.3-1 -R /var/www/html
Next, rename file /var/www/html/phpvirtualbox/config.php-example tovar/www/html/phpvirtualbox/config.php.
# mv config.php.example config.php
Open the configuration file to edit and add ‘username‘ and ‘password‘ we just created in the above step.
# vi config.php
Finally, restart VirtualBox and HTTP server.
# service vbox-service restart
# service httpd restart
Now forward the port and access it on a headed server.
http://192.168.0.15/phpvirtualbox-4.3-1/

PHP Virtualbox Login

PHP Virtualbox Dashboard
30. Password Protect GRUB
Password protect your boot loader so that you get an additional level of security right at the booting time. Also you get a protection layer of protection at physical level. Protect your Server by locking GRUB at boot to avoid any unauthorized access.
First make backup of two files, so that if anything goes bad, you have the option to revert back. Create a backup of ‘/etc/grub2/grub.cfg‘ as ‘/etc/grub2/grub.cfg.old‘.
# cp /boot/grub2/grub.cfg /boot/grub2/grub.cfg.old
Also, Create a backup of ‘/etc/grub.d/10_linux‘ as ‘/etc/grub.d/10_linux.old‘.
# cp /etc/grub.d/10_linux /etc/grub.d/10_linux.old
Now open ‘/etc/grub.d/10_linux‘ and add the below line at the end of the file.
cat <<EOF
set superusers=”tecmint”
Password tecmint avi@123
EOF

Password Protect Grub
Notice in the above file, replace “tecmint” as username and “avi@123” as password with your username and password.
Now generate the new grub.cfg file by issuing following command.
# grub2-mkconfig --output=/boot/grub2/grub.cfg
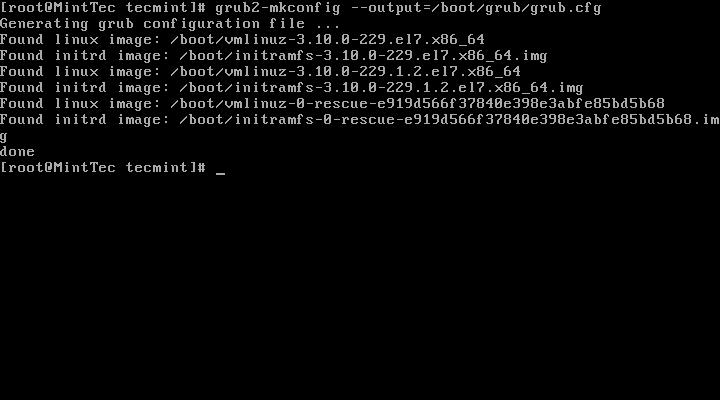
Generate Grub File
After creating new grub.cfg file, reboot the machine and press ‘e‘ to edit. You will find that it requires you to enter ‘valid credentials‘ in order to edit boot menu.

Password Protected Boot Menu
After entering login credentials, you will able to edit grub boot menu.

Grub Menu File
Also you can generate encrypted password in place of plain password as shown in the above step. First generate an encrypted password as suggested below.
# grub2-mkpasswd-pbkdf2

[Enter Normal password twice]
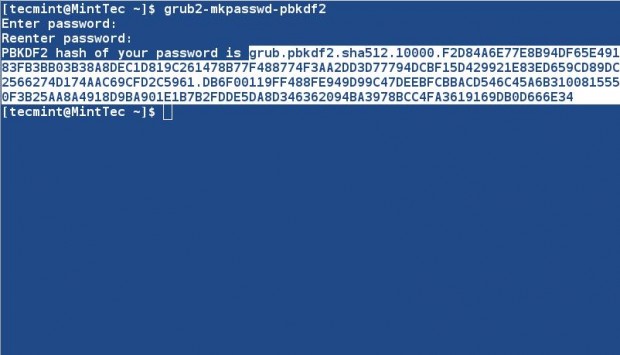
Generate Encrypted Grub Password
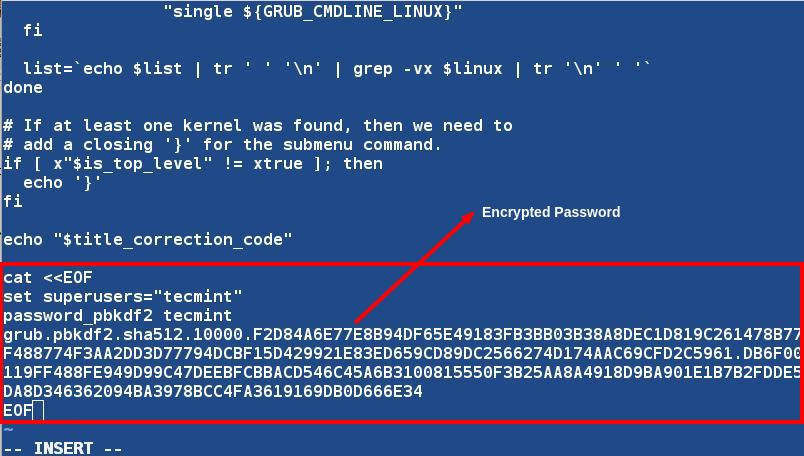
Now open ‘/etc/grub.d/10_linux‘ file and add the below line at the end of the file.
cat <<EOF
set superusers=”tecmint”
Password_pbkdf2 tecmint
grub.pbkdf2.sha512**************************************************
EOF
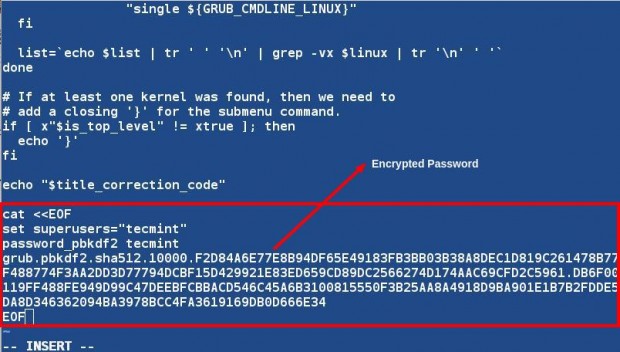
Encrypted Grub Password
Replace the password with the one generated on your system. Don’t forget to cross check the password.
Also note you need to generate grub.cfg in this case as well, as described above. Reboot and next time you press ‘e‘ to edit, you will be prompted for username and password.
We’ve tried to cover most of the necessary post-installation points of industry standard distributionsRHEL 7 and CentOS 7. If you find that we’ve missed certain points or you need to extend this post with a new post-install things, you may share with us, we will include your point in this article by extending it.
 Uploading ....